If there is one recipe I love the most now that we are gearing up for back to school, it’s an easy one!
I am always looking for quick but delicious dinner idea’s and this lazy lasagna is defiantly one of them that your kids will love too which is always a win for me as mine can be pretty picky.
Obviously you can customize however you want but I like to keep it pretty simple with ingredients.
This also makes really good leftovers so even better in my opinion.
Let’s get started and gather the ingredients!
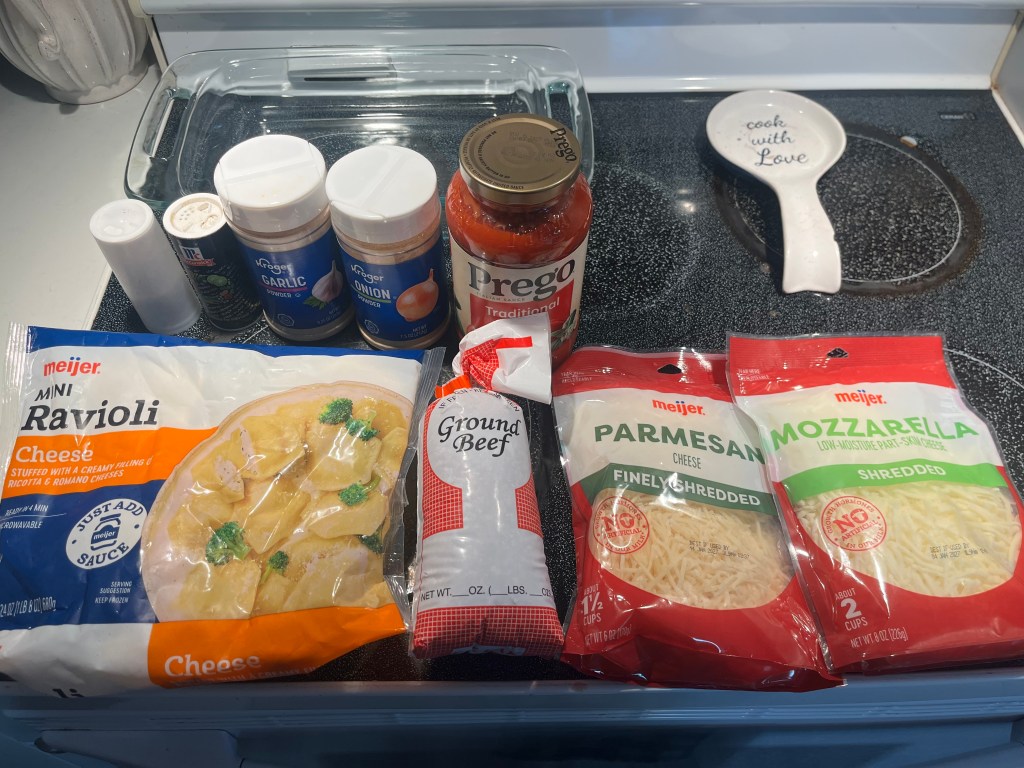
Ingredients:
1 (24 oz) bag of frozen cheese ravioli
1 lb ground beef
1 (24 oz) jar of pasta sauce
2 cups shredded mozerella
1/2 cup shredded parmesan
1 tablespoon of garlic powder (optional)
1 tablespoon of onion powder (optional)
salt and pepper to taste (optional)
Instructions:
Preheat your oven to 400 F and grab a 9×13 pan
Brown and drain your ground beef
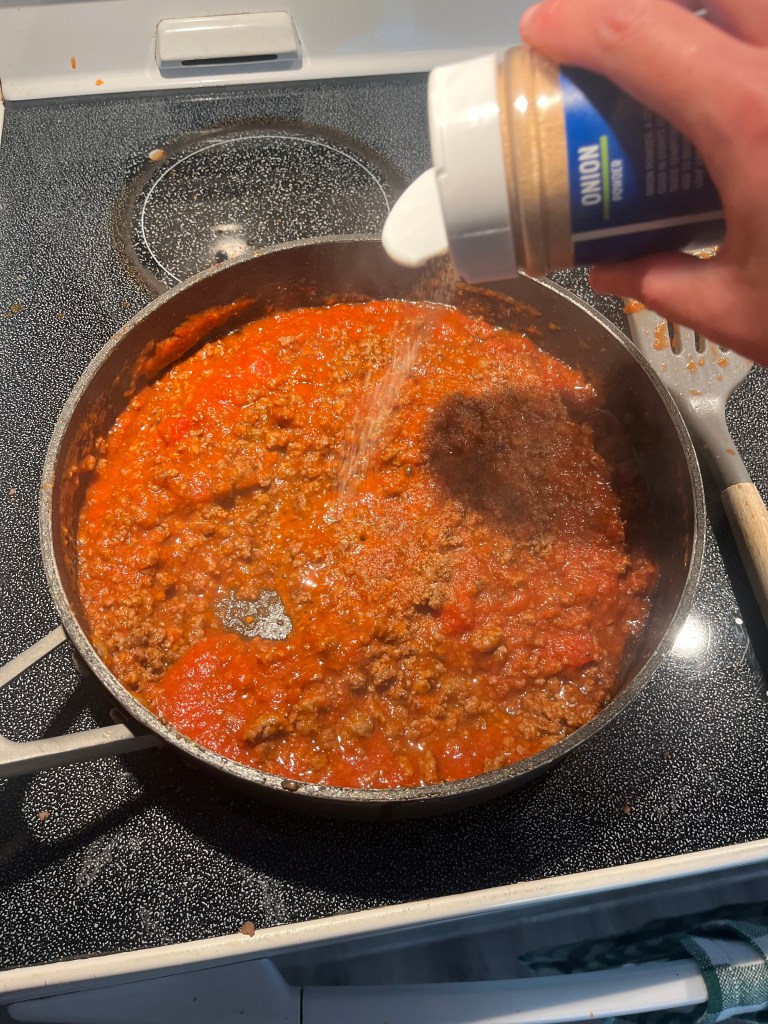
Add your pasta sauce to the ground beef and season to your liking
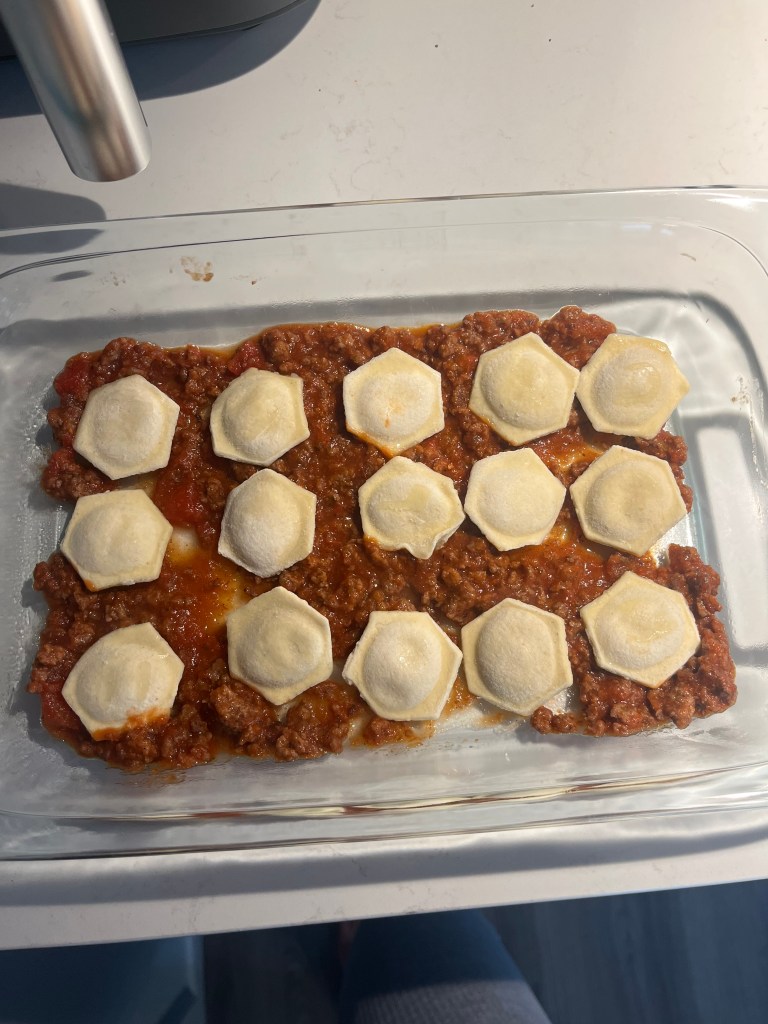
Spread a thin layer of your meat sauce onto the bottom of the pan (about 3/4 cup)
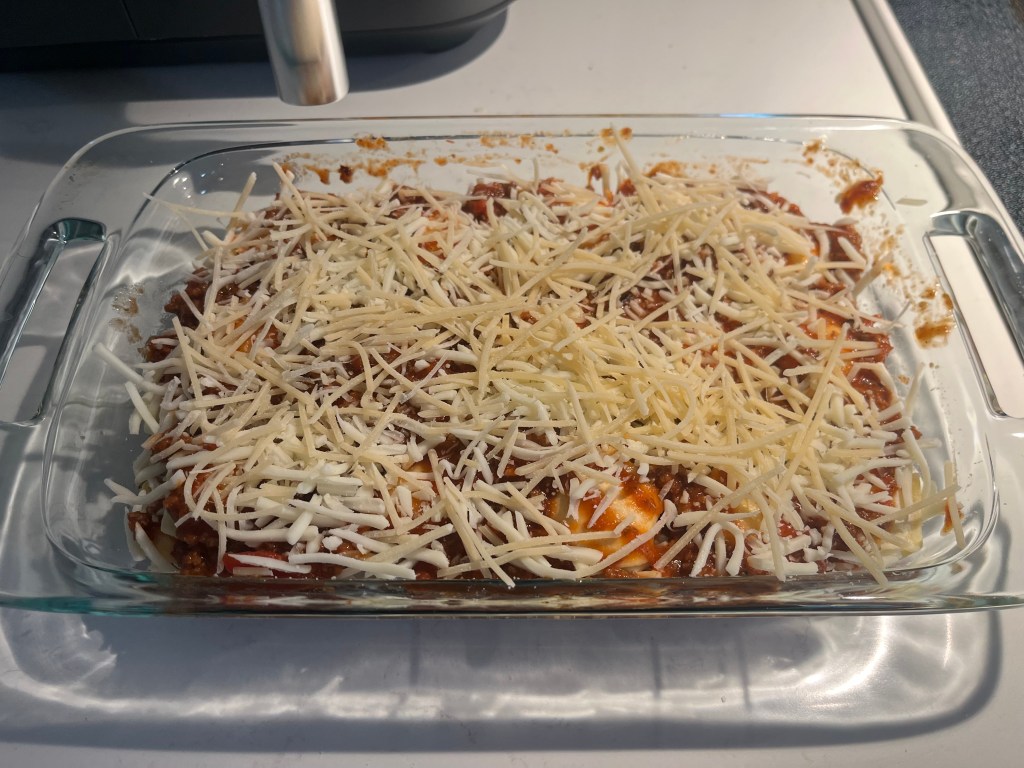
Arrange half of the frozen ravioli into a single layer over the sauce
Top with half of the remaining meat sauce and half of the mozzarella cheese.
Repeat the layers starting with what’s left of the ravioli. Finish by topping with the remaining sauce and cheese.
Sprinkle with parmesan cheese if you would like.
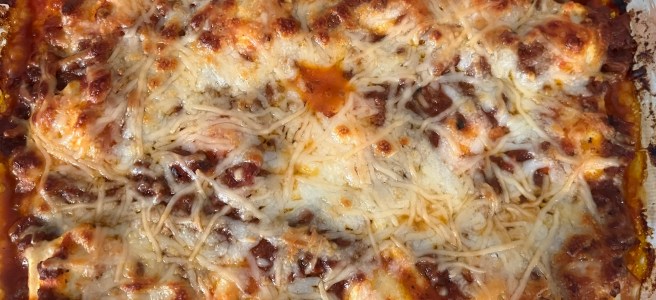
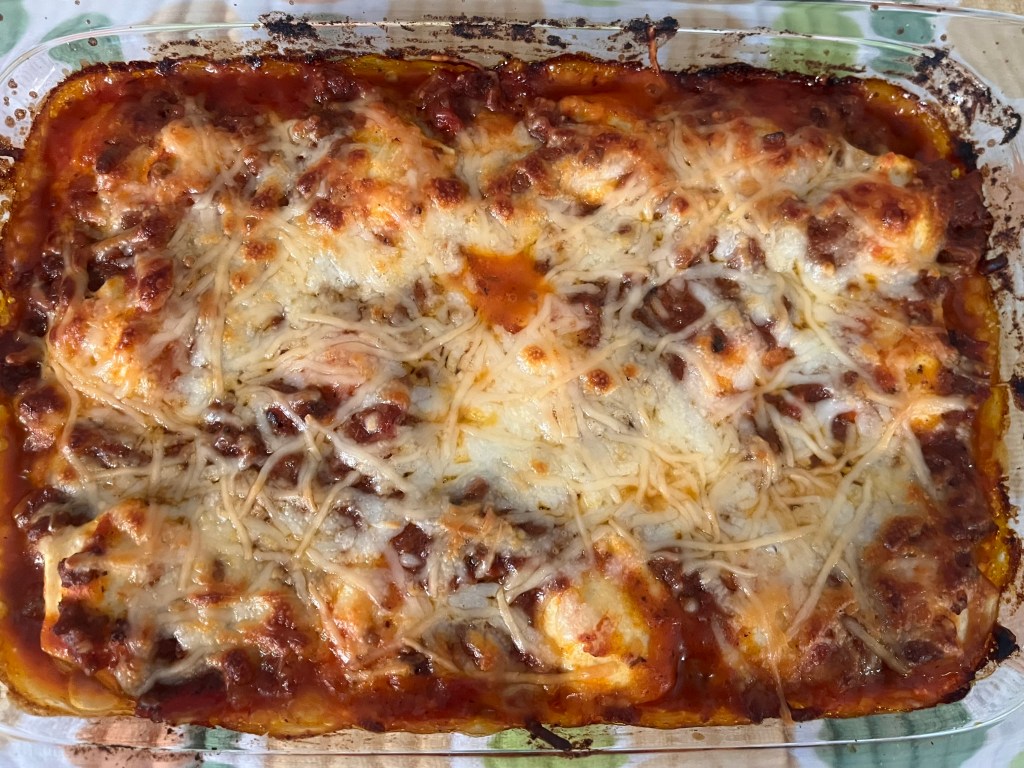
Cover the baking dish with aluminum foil and bake for 30 minutes. Remove the foil and conitune baking for an additional 15 minutes, or until the cheese starts to brown.
I served mine with garlic sticks but you could do a side salad, favorite vegetables or whatever you prefer and enjoy!
Let me know what your favorite easy dinner is, I am always looking for ideas!
Fun fact, my husband is a total sports fanatic and to say he is excited for football season is an understatement.
So game day appetizers are a staple in our house on the weekends.
I thought it would be fun to share 3 of our favorite game day appetizers to kick off the official start of football season!
Cold Buffalo chicken dip
I love making this cold or hot but since it’s still warm out I am sharing the cold dip version.
Ingredients
8 ounces cream cheese, softened
1/3 cup buffalo sauce
2 tablespoons ranch seasoning mix
1 cup shredded cheddar cheese
1 cup finely chopped cooked chicken
Green onions
Instructions
Combine all ingredients in a bowl.
Cover and chill for at least 1 hour.
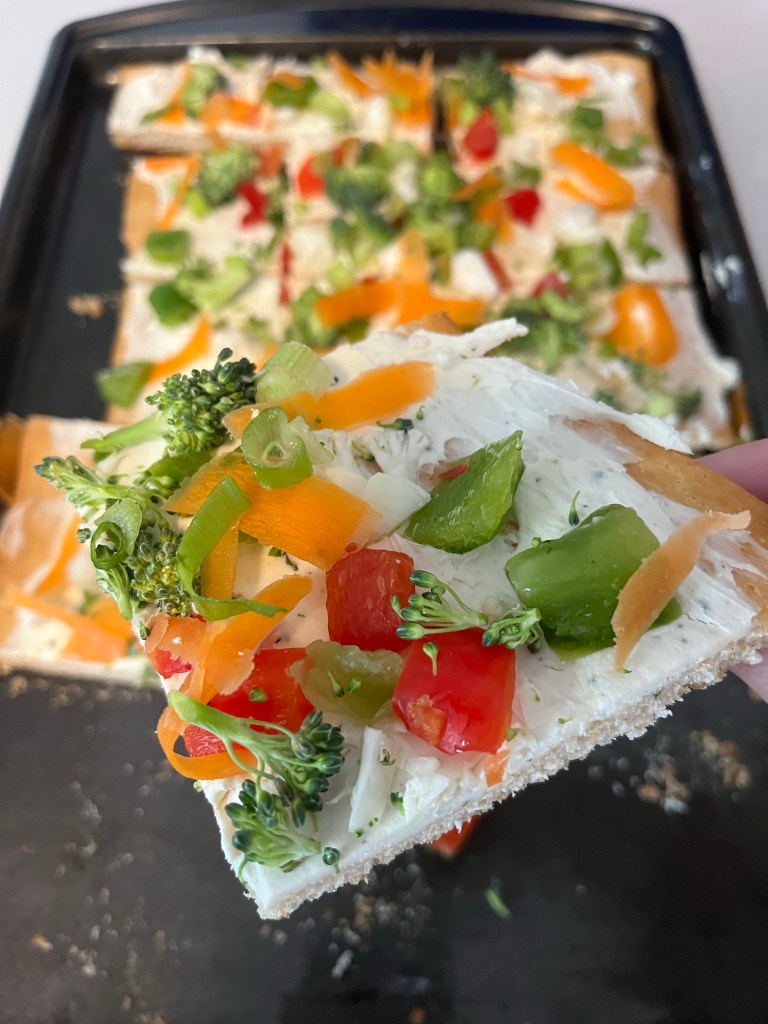
Veggie Pizza
This recipe is delicious and so easy! Let me show you what you need.
Ingredients
Package of crescent roll (I used the sheet pan one)
8 ounce block of cream cheese
Ranch dry seasoning packet
Chopped broccoli
Chopped cauliflower
Diced bell peppers
Shredded carrots
Green onions
Instructions
Preheat oven to 375 degrees. Line a 11-inch by 17-inch or larger baking sheet with parchment paper or aluminum foil.
Unroll crescent roll and add to the baking sheet. Pressing to edges to form a crust.
Bake the crust according to the package instructions, about 12 to 15 minutes or until golden brown. Remove from oven and cool completely, at least 30 minutes.
Combine cream cheese and ranch seasoning in a bowl.
Spread mixture onto cooked crescent roll.
Top with your vegetables and chill before cutting into squares.
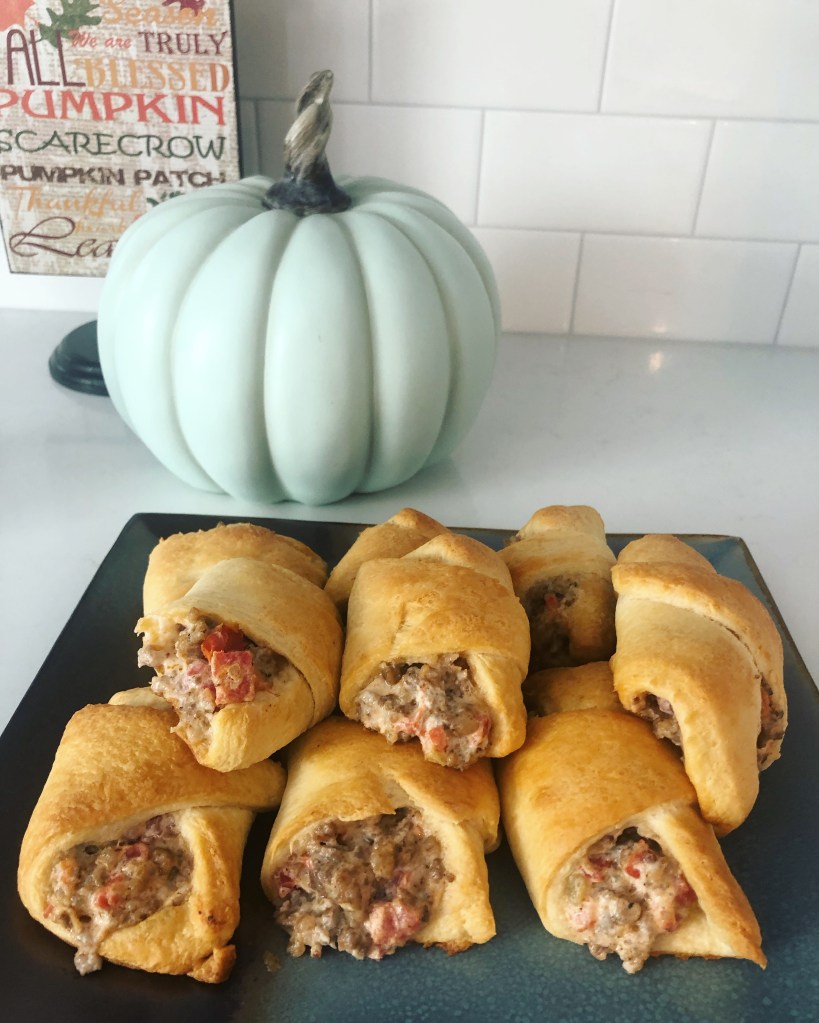
Rotel sausage and cream cheese crescents
This recipe is delicious! And only 4 ingredients.
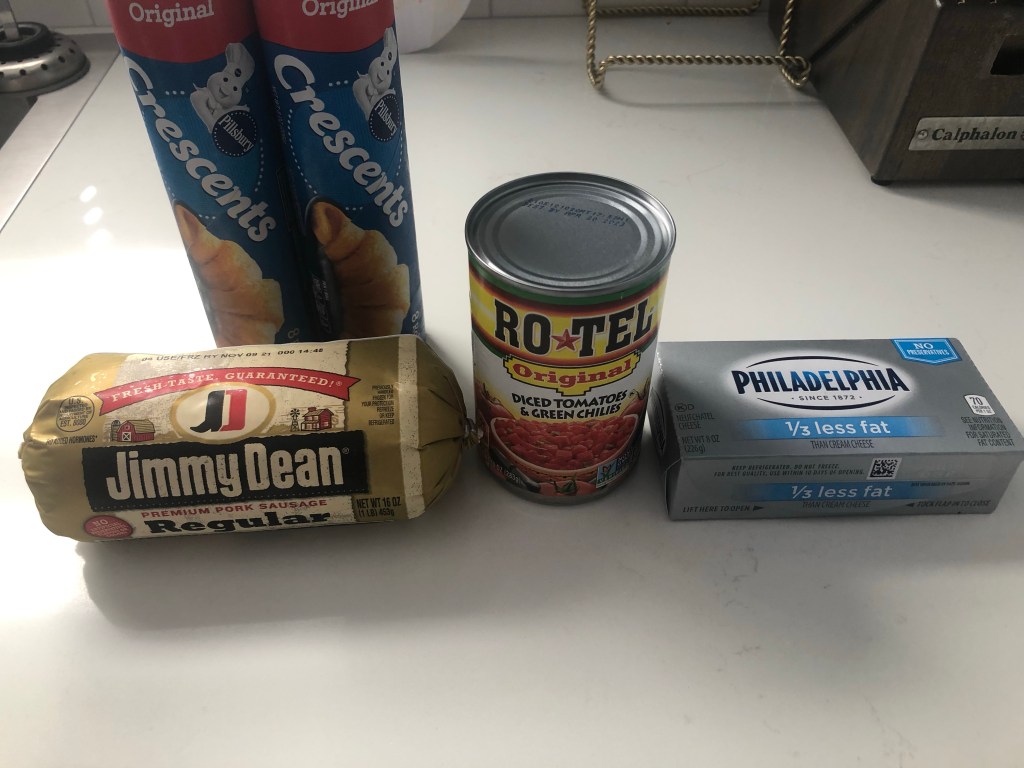
Ingredients
2 original crescent roll packages
Pork Sausage, I used Jimmy Dean
8 ounce block of cream cheese
Rotel tomatoes and green chilies
Instructions
Preheat your oven to 375
Cook your sausage and drain well. Transfer to medium sized bowl.
Add your cream cheese.
Drain rotel and transfer to the bowl as well.
Combine ingredients.
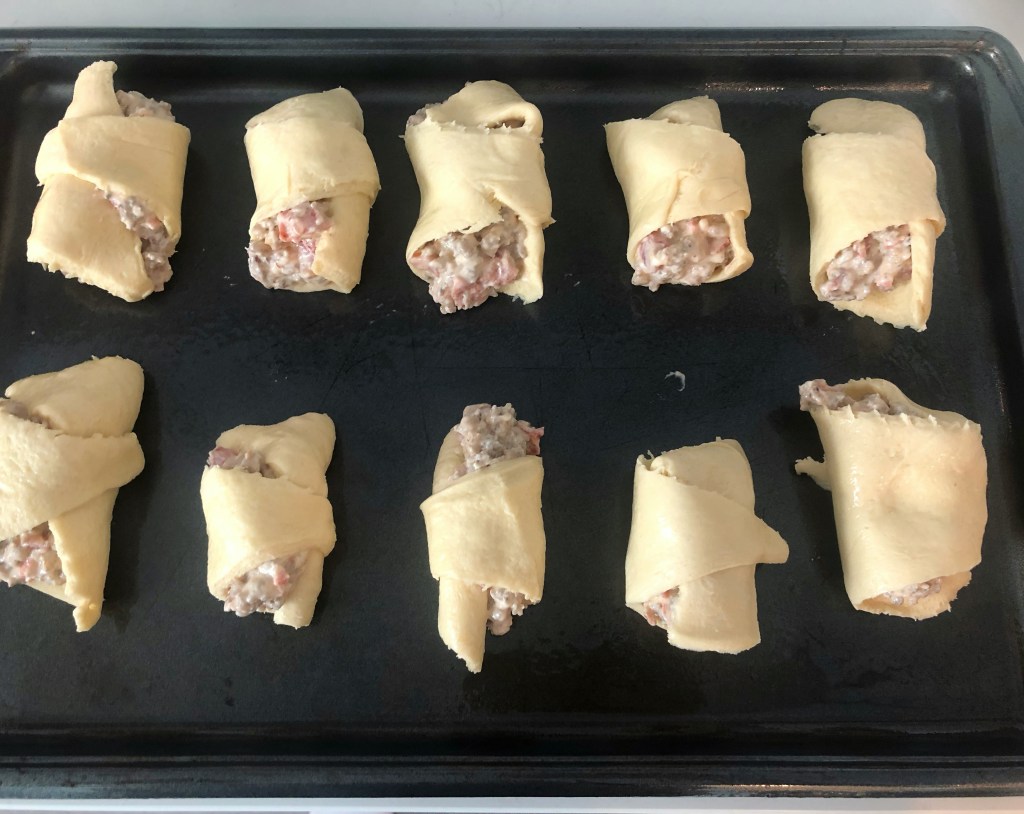
Line your crescent rolls onto an already greased sheet pan. Scoop a small amount of mixture onto each crescent roll.
Roll the crescents rolls up. They don’t have to look perfect.
Bake for 15 minutes in the oven.
Bring on Fall and football season! I hope these 3 recipes make game day and party appetizers easier for you.
Oh my goodness, I have found theeee best football season dish to make!
If I didn’t love sliders already because Hawaiian rolls are life, I love them even more after making this recipe.
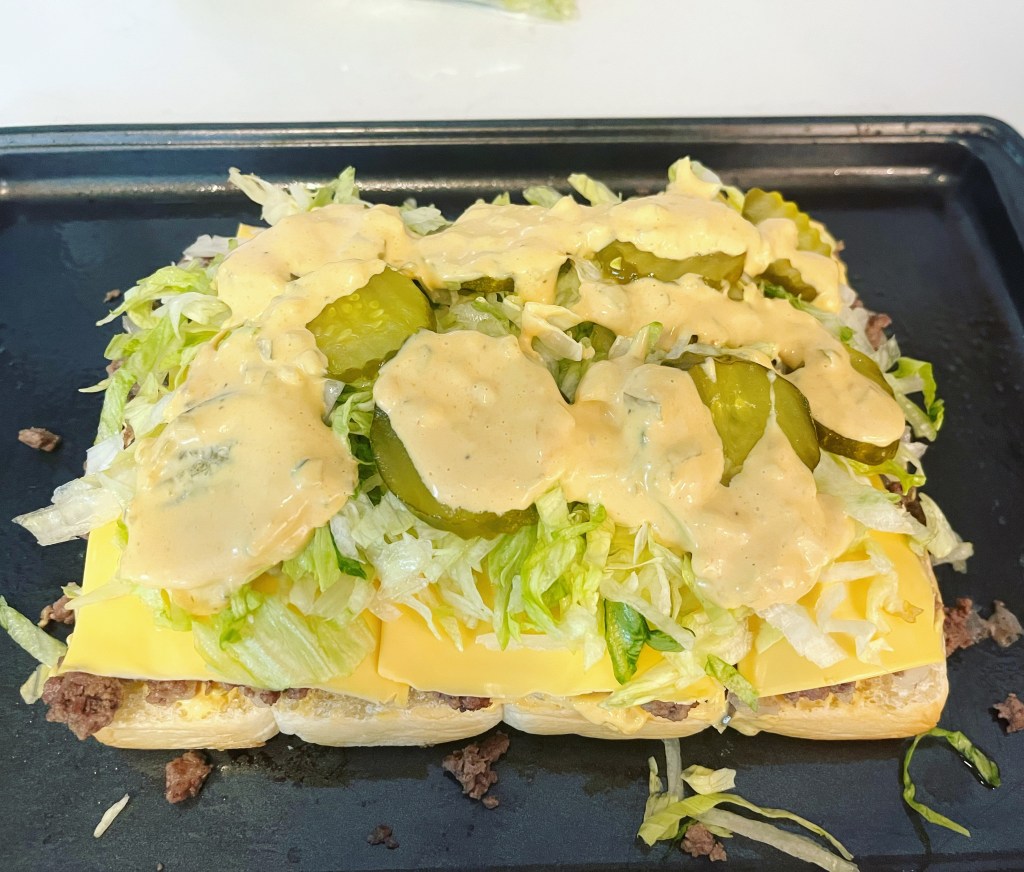
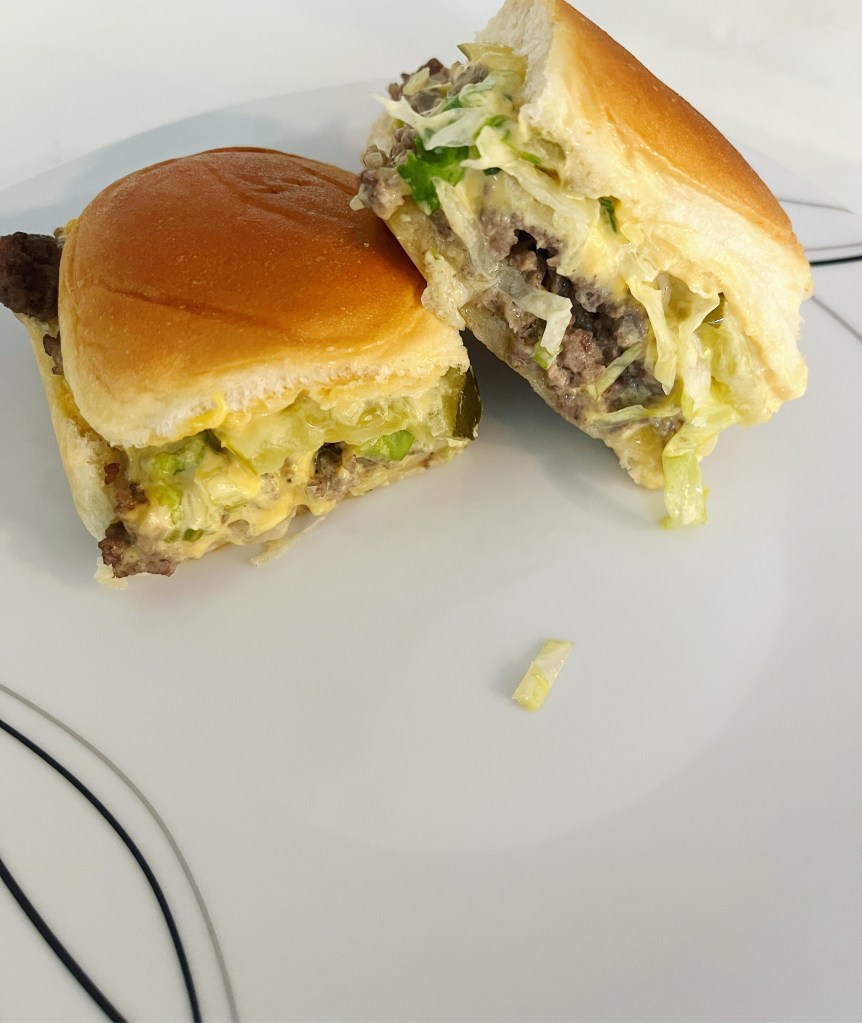
BIG MAC SLIDER’S!
Yes, I said it. Big Mac sliders and they are absolutely delicious. I cannot wait to make this for all the big football games we watch as the Fall season is upon us.
Let’s talk ingredients
Ingredients:
• 3/4 lb ground beef
• 1 medium yellow onion, chopped and divided
• 1 teaspoon salt
• 1/2 teaspoon black pepper
• 1/2 teaspoon garlic powder
• 1/2 teaspoon onion powder
• 6 slices American or sharp cheddar cheese
• 1/2 cup iceberg lettuce , shredded
• 1/4 cup pickles , sliced
• 2 tablespoons butter, melted
• Hawaiian rolls
You could also add sesame seeds to the top to make it a true Big Mac type slider but this particular day I did not have any on hand.
The true star of this show though is the sauce. Definitely chefs kiss. It did not make it soggy at all either which was a relief.
Sauce:
• 1/4 cup mayonnaise
• 2 tablespoons relish
• 2 tablespoons yellow mustard
• 2 tablespoons ketchup
• 1/2 teaspoon onion powder
• 1/2 teaspoon garlic powder
Now let’s assemble.
Instructions:
• Preheat the oven to 350°F.
• In a large pan on medium-heat, add the ground beef, half of the diced onion, salt, pepper, garlic powder, and onion powder. Cook until the beef is no longer pink and cooked through, about 5-7 minutes.
• Cut the rolls in half lengthwise.
• In a bowl, combine the mayo, relish, mustard, ketchup, onion powder and garlic powder and mix. Spread half of the sauce on the bottom layer of the rolls.
• Top with the cooked beef, sliced cheese, lettuce, and pickles. Drizzle the remaining sauce on top and place the top half of bread rolls on the sliders.
• Brush the melted butter on top of the sliders.
• Bake the sliders for 10 minutes or until the cheese has melted.
• Cut the sliders into 12 individual slices.
Seriously I can’t wait to make these again! They were delicious and will definitely be a party favorite.
Let me know if you’ve tried these! And if you do try this recipe share with me how it turned out 🙂
I am all about easy recipes and very little prep time.
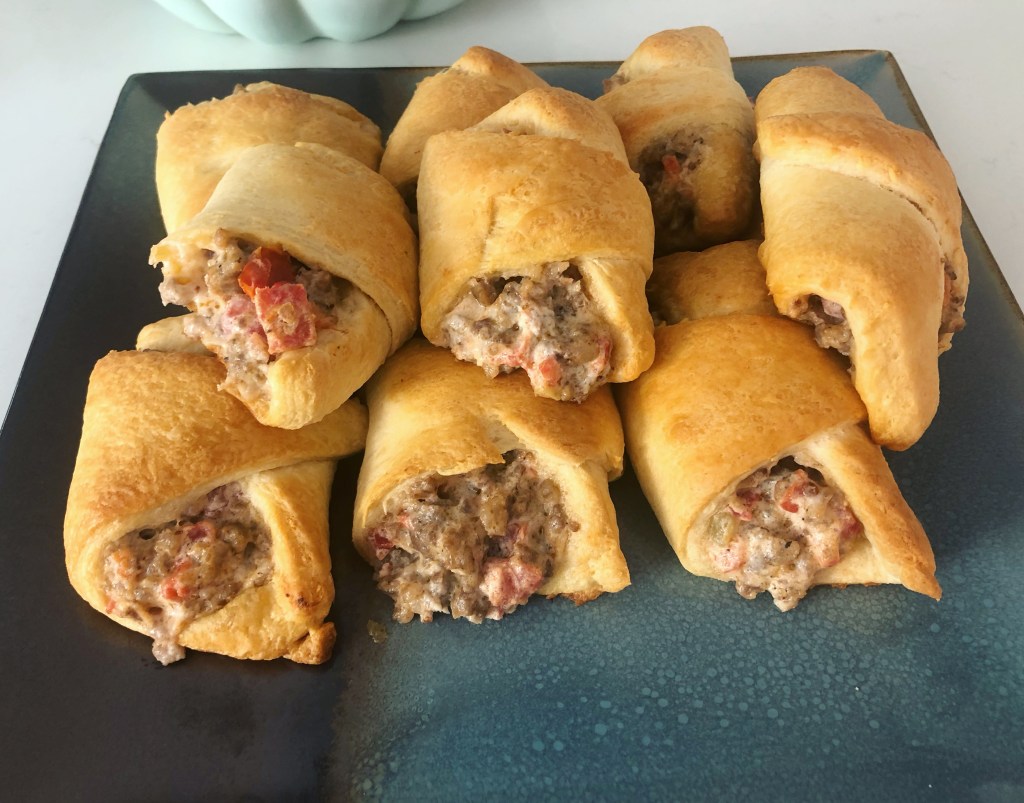
These rotel sausage and cream cheese crescent rolls are not only delicious but it’s so easy and makes a perfect game day and holiday appetizer.
I’m so excited to share this yummy recipe because my husband and I devoured them!
Let me show you how to make it.
Ingredients
2 original crescent roll packages
Pork Sausage, I used Jimmy Dean
8 ounce block of cream cheese
Rotel tomatoes and green chilies.
I mean seriously, 4 ingredients!? Can’t get any better than that.
Instructions
Preheat your oven to 375
Cook your sausage and drain well. Transfer to medium sized bowl.
Add your cream cheese.
Drain rotel and transfer to the bowl as well.
Combine ingredients.
Line your crescent rolls onto an already greased sheet pan. Scoop a small amount of mixture onto each crescent roll.
Roll the crescents rolls up. They don’t have to look perfect.
Bake for 15 minutes in the oven.
Don’t they look absolutely delish!? They so are and I think this is the perfect bring to a party platter. It will be a crowd pleaser for sure and it hardly takes any time at all.
Let me know if you have tried this recipe or if you plan to try it be sure to let me know how you liked it!
My family and I started a tradition this past fall. We love soups around here, so we decided that every Saturday (almost), we would all help make some soup!
This loaded baked potato soup is so so simple, but so so yummy!
No one in my daily complains about what we eat, which is a rarity when you have a 9 & 7 year old!
I’m going to share my recipe with you! It is something so simple, you could throw all the ingredients in the crock pot in the morning & it will be ready when you’re home.
We like to eat ours with a baguette or some type of bread. I’ve even served it with carrots and celery.
Here is what you will need! I just throw it all in the crock pot and set it on low for about 6 hours. You pretty much just want to make sure it’s all melted together.
1 bag Hash browns
1 block ofCream Cheese
1 can Cream of Chicken soup
2 bags Cheddar cheese (we like sharp)
Chicken broth
Bacon bits
I do save some bacon bits and cheese for on top once it’s in my bowl. You could also add chives or even sour cream if you wanted.
This recipe is so quick and simple, but it’s cheap too! Who doesn’t love a meal that you can throw together for under $15!
If you don’t know me personally, then you don’t know how MUCH I love Target. I am actually able to buy all the ingredients at my local Target, and it only has a very small grocery section.
I just wanted to say thank you for your patience as we navigate this crazy life of being working moms! We have a wonderful support from our friends and family!
Next week, I’m posting about my top five beauty must haves for being a busy mama! See you soon!
It is full on fall in Michigan right now. The crisp air, the leaves are beginning to fall and change colors, and unfortunately the days are getting shorter.
We do a TON of baking during the cooler months. My favorite is when we use our fresh apples from the orchard. I mean, why would I go to the local grocery store and spend $5 on apples when I can go spend $100 at the apple orchard?!
I made some apple pies, and those are delicious. It makes me reminisce about my grandfather that LOVED apple pie, with a big scoop of vanilla ice cream. It was his favorite. Every year for his birthday, my mom would bake him a fresh pie.
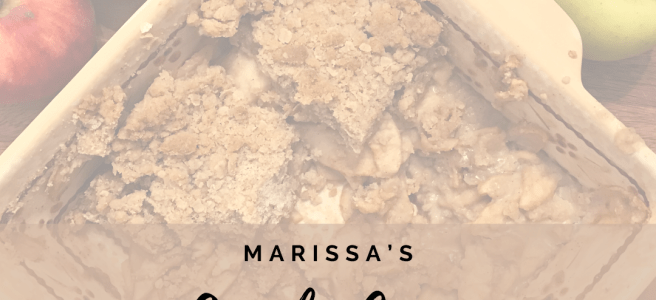
I still think apple crisp is easier, and in my opinion SWEETER! I still enjoy it with vanilla ice cream, but occasionally I’ll have some for breakfast.
I’m going to share my recipe with you today. I have a secret ingredient… still debating if I’ll share that!
First, you peel your very expensive apples. I picked them with my family, so they taste better, right?! I peel about 6-8, depending on the size. I feel they were a bit small this year so I went with 8! I then slice them, thinly. I had to hand the knife over to my husband. I almost chopped my finger. I’ll spare you the details, and pictures.
Second, you want to stir all your dry ingredients together: flour, sugar, cinnamon, and nutmeg! Yup, that’s my secret. I know it’s a very common spice, but to me it made the difference!
I then add the dry ingredients with my thinly sliced apples. At this point I also add a little bit of vanilla. It just makes the flavors a little more rich. I let those sit and “marinate” while I make the “crisp”!
Mix your oatmeal, brown sugar and cubed butter. I let my girls do this part and get messy.
I put mine in a smaller dish, then a 13×9! I used a 9×9. Not exactly sure why, it was just a pretty dish I guess! Then I plopped it in the oven at 350 degrees for about 30 minutes.
I let it cool slightly, then served it warm with a pile of vanilla ice cream.
My whole family loved it. Well after the decided they weren’t afraid to try something mom baked.
I’m gonna share the recipe below! Enjoy, and let me know if you tried it!
6-8 apples, peeled and chopped
2 Tbsp granulated sugar
1/4 tsp nutmeg
1 3/4 tsp ground cinnamon
1/2 cup sugar
1 cup light brown sugar
3/4 cup old fashioned oats
3/4 cup all-purpose flour
1/2 cup cold unsalted butter, diced into small cubes
1/2 tsp vanilla
pinch of kosher salt
INSTRUCTIONS
1. Preheat oven to 350 F degrees. Butter a baking dish, or spray with non-stick cooking spray. Set aside.
2. In a mixing bowl, add chopped apples, granulated sugar, 3/4 tsp of the cinnamon, nutmeg, vanilla and flour. Stir to combine, then transfer to prepared baking dish.
3. In a separate mixing bowl, add topping ingredients (brown sugar, oats, flour, 1 tsp cinnamon, salt, and diced cold butter). Use a pastry cutter to cut the butter into the oat mixture, using a slight downward twisting motion, until mixture resembled pea-sized crumbs. Alternatively, you can use two forks or even your hands to cut butter into the mixture.
4. Spread topping over apples in baking dish, and gently pat to even it out. Bake 40-50 minutes, until golden brown and bubbly.
5. Serve warm and enjoy!
In full transparency I used a Pinterest recipe, but I tweaked it a lot to my liking! Isn’t that what cooking and baking is about, though?!
I hope if you make it, you enjoy it as much as my family did!
It’s been hard being cooped up in the house. I went back to work Monday (BLAH!), and I miss being home with my girls and hubs.
During the time of self-isolation, I indulged (as I’m sure we all did) in some major sweets! My go-to: EDIBLE COOKIE DOUGH!
Just admit it! Your favorite part about making chocolate chip cookies is the cookie dough. I know that’s mine.
My oldest daughter loves to bake, but she’s been a little preoccupied with Pokemon to want to help in the kitchen. It’s my littlest daughter who has been helping me make it. She claims she is the “Secret Ingredient”! So sweet!
The very first time I made it, I wanted chocolate chip cookies SO BAD, but we were out of eggs! During this time, it isn’t so easy just running to the store, so in comes this recipe.
We made quite a few successful batches, but there were some fails as well. I’m going to give you some of the tips I found along the way!
First things first, did you know you shouldn’t eat raw flour?! It should be cooked before you indulge in this snack. I simple pop my flour into the microwave for 60 seconds. Maybe more or less depending on your microwave, I stop around 30 seconds, and whisk it around, otherwise it’ll clump together. I then let it cool. It worked better when it wasn’t as hot!
Second, don’t be a #hotmessmom like me and forget to pull out the butter. It should be at room temp. If you do end up forgetting, just soften it in the microwave!
Third, I say vanilla is “optional” because I ran out after my second batch, and no one really noticed a difference. I thought it was richer with it, but again it’s “optional”. Don’t make your hubs go out and get it if you’re out!
Last but not least, chocolate chip to dough ratio is COMPLETELY OPTIONAL! I LOVE to have chocolate chips in every dough bite, BUT my hubs just wants to eat the dough and no chocolate. Weird, I know!
Sooo, Without further ado, I present my recipe for EDIBLE COOKIE DOUGH!
INGREDIENTS:
1 c. unsalted butter (room temperature)
1 c. brown sugar
¼ c. granulated sugar
2 t
1 tsp. Salt
2 c. all-purpose flour
1-2 tbsp. Milk
1-? C. chocolate chips
INSTRUCTIONS:
“Cook” or heat up your flour. The internal temp should be 165 degrees.
In a large mixing bowl, beat together on low to medium speed, butter, brown sugar, and granulated sugar. It should be creamy, and a light brown color. YUM! Beat in the salt, and the vanilla (if you have it!)
Beat in flour until combined. I add about ½ a cup at time so it doesn’t explode everywhere! It will start to come together. SLOWLY add your milk a little at a time. Fold in your chocolate chips with a spatula.
ENJOY!
This is honestly such a quick and easy recipe!
I hope you enjoy this treat as much. Let me know if you end up making it!